Update, October 2013: I wrote a book, Game Development with Three.js, that goes into much more detail on the concepts discussed in this article and much more about how to build a fuller in-browser game. Check it out if you'd like to learn more!
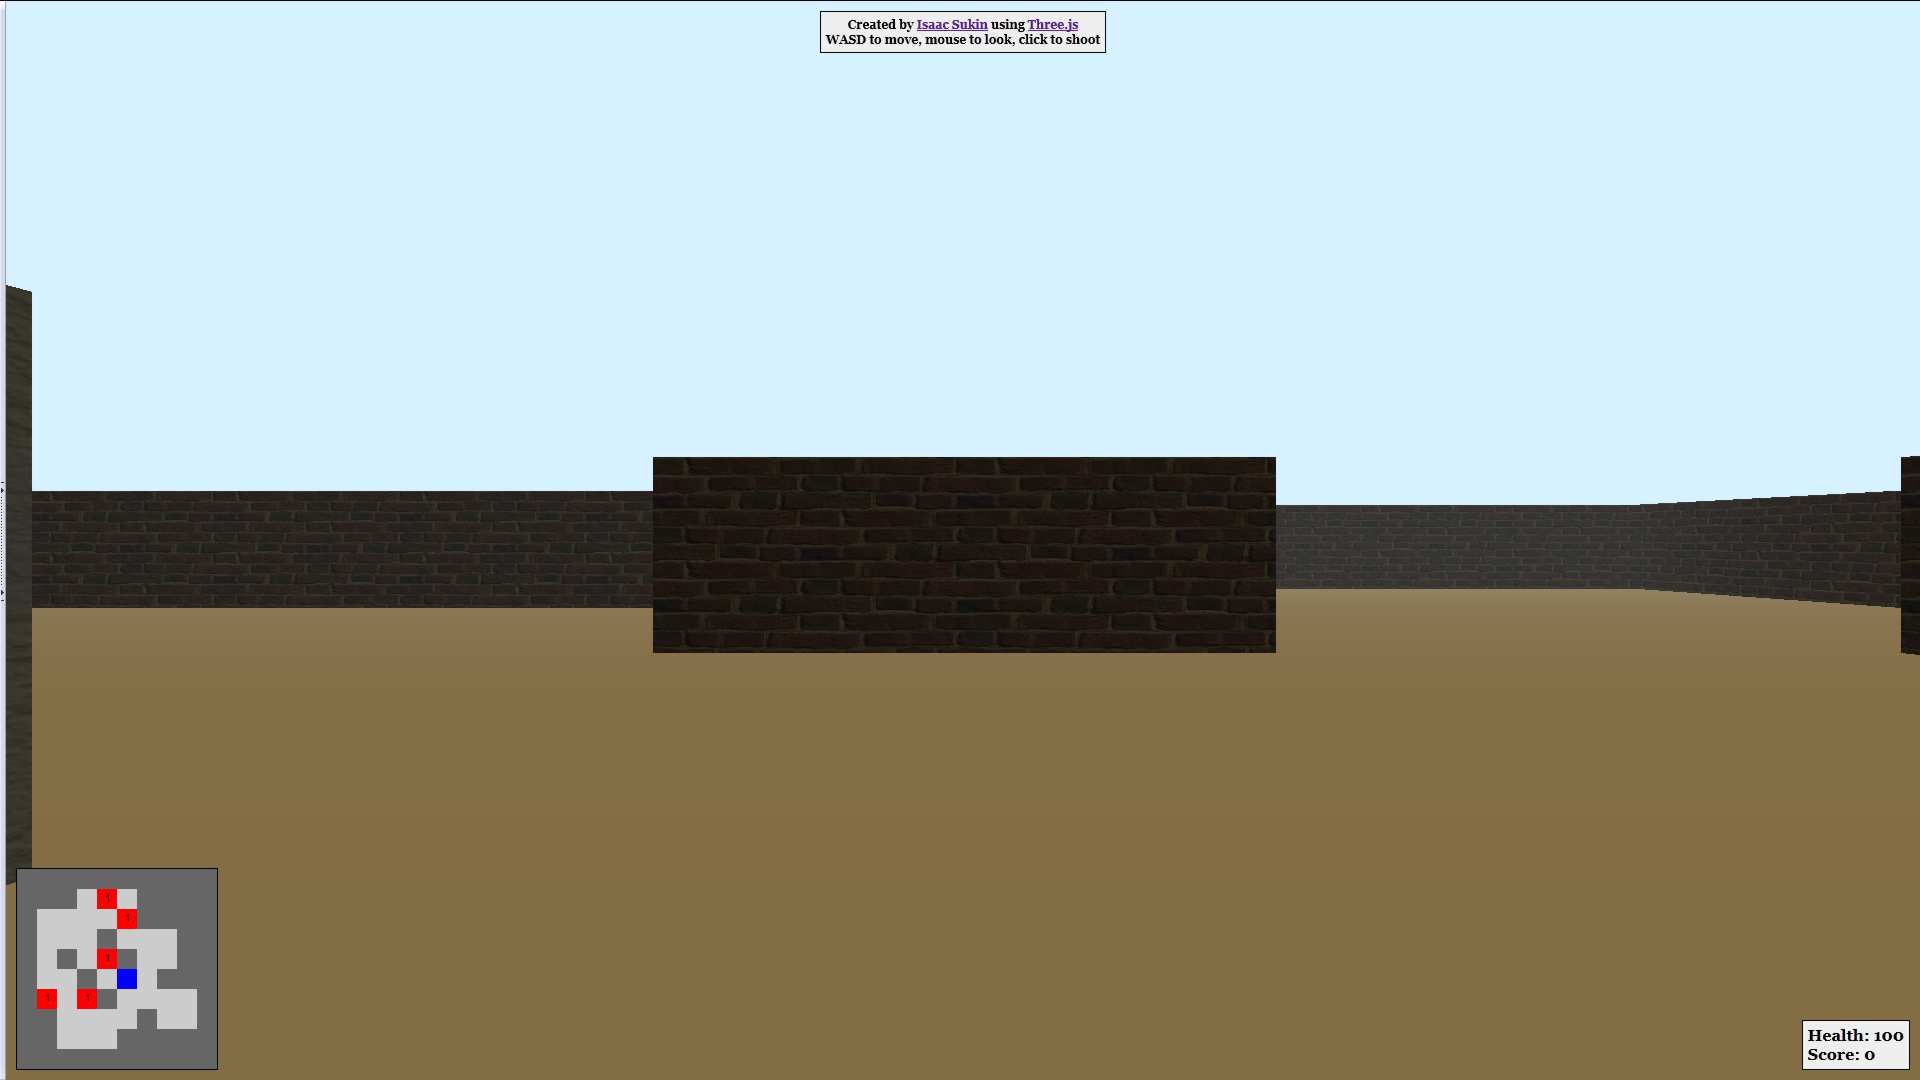
Last weekend I created Nemesis, a 3D First-Person Shooting game completely in the browser using WebGL with Three.js. I'm really excited that this is possible in the browser and that I was able to do it with no prior WebGL or Three.js experience in 23 hours for the AngelHack hackathon. This post is intended to explain the code so that other people can do the same. Be warned: the code is a little messy (although I've cleaned it up slightly in the examples for clarity). You should understand JavaScript and have at least intermediate programming experience. Also note that I used jQuery which simplified the limited DOM manipulation required.
The main file to look at is main.js. Notice the note at the top -- for some reason Three.js uses X and Z as the horizontal axes and Y as the vertical axis, which bit me several times.
The basic flow of how the game works is:
- Do some initial setup.
- Wait for the user to click on the intro screen to indicate they're ready to play.
- Initialize the environment.
- Create a new world ("scene" in Three.js terms)
- Add a "camera" to it so we know from what perspective the world should be rendered
- Track the keyboard/mouse so we can let the player move, look around, and shoot
- Put objects into the world
- Set up the enemy bots
- Tell Three.js we want to render using WebGL
- Create the HUD (Heads-Up Display, where the score/health/radar/etc. appears)
- Run the main game loop.
- Check collision for everything -- walls, player, AI, bullets, health pickup
- Move the player and AI
- Check whether the player is dead yet and if so display the game over screen
We're going to create a 3D game where the player can move around and shoot at computer-controlled players that also move around and shoot. The player and enemies collide with the walls. Player and enemy health should drain when they get hit by bullets, but the player's health can be restored by a health pickup. When the player's health is drained the game is over, and when enemies' health is drained they respawn. The screen briefly flashes red when the player gets hit. A HUD displays the player's score and health as well as a radar showing a bird's-eye view of the map.
Let's dive in. Initial setup, lines 20-34:
// Semi-constants
var WIDTH = window.innerWidth,
	HEIGHT = window.innerHeight,
	ASPECT = WIDTH / HEIGHT,
	UNITSIZE = 250,
	WALLHEIGHT = UNITSIZE / 3,
	MOVESPEED = 100,
	LOOKSPEED = 0.075,
	BULLETMOVESPEED = MOVESPEED * 5,
	NUMAI = 5,
	PROJECTILEDAMAGE = 20;
// Global vars
var t = THREE, scene, cam, renderer, controls, clock, projector, model, skin;
var runAnim = true, mouse = { x: 0, y: 0 }, kills = 0, health = 100;
var healthCube, lastHealthPickup = 0;
The ALL-CAPS variables are numbers that are used several times so I wanted a place where I could fiddle with their values without having to change it in multiple places. The names are pretty self-explanatory. The other variables are basically just a bunch of things I wanted to keep track of without passing them around to every function; their use will be explained later. For now, just note that I aliased the THREE object to just t for brevity and because I kept typing "Three" instead of "THREE."
Before the game starts, we also have to show an intro screen (lines 41-51):
// Initialize and run on document ready
$(document).ready(function() {
	$('body').append('<div id="intro">Click to start</div>');
	$('#intro').css({width: WIDTH, height: HEIGHT}).one('click', function(e) {
		e.preventDefault();
		$(this).fadeOut();
		init();
		setInterval(drawRadar, 1000);
		animate();
	});
});
We'll get to what init(), drawRadar(), and animate() do in detail in a second, but it should be obvious what's going on here. When the "Click to start" screen is clicked, it fades to the game, which initializes and then starts the main game animation loop.
Also part of the initial setup is part of the map creation, lines 7-18:
var map = [ // 1  2  3  4  5  6  7  8  9
           [1, 1, 1, 1, 1, 1, 1, 1, 1, 1,], // 0
           [1, 1, 0, 0, 0, 0, 0, 1, 1, 1,], // 1
           [1, 1, 0, 0, 2, 0, 0, 0, 0, 1,], // 2
           [1, 0, 0, 0, 0, 2, 0, 0, 0, 1,], // 3
           [1, 0, 0, 2, 0, 0, 2, 0, 0, 1,], // 4
           [1, 0, 0, 0, 2, 0, 0, 0, 1, 1,], // 5
           [1, 1, 1, 0, 0, 0, 0, 1, 1, 1,], // 6
           [1, 1, 1, 0, 0, 1, 0, 0, 1, 1,], // 7
           [1, 1, 1, 1, 1, 1, 0, 0, 1, 1,], // 8
           [1, 1, 1, 1, 1, 1, 1, 1, 1, 1,], // 9
           ], mapW = map.length, mapH = map[0].length;
For simplicity's sake, I decided to create the map using a 2D grid. The 1's and 2's represent walls with different textures; the 0's represent space where the player can walk around. This also made it really easy to change the map and play with how big it should be relative to the player's movement speed and height. This was crucial because otherwise I would have had to place every wall manually and in 23 hours there was not enough time to experiment with that. (This is also a huge cop-out; making the map flat meant that I didn't have to calculate distance from the ground to let the player go up ramps/stairs/hills/elevators.) The map actually gets built in setupScene(), which we'll get to shortly.
Now that we have some global variables and permission to start the game, we need to run init() to initialize the complete game environment (lines 62-114):
// Setup
function init() {
	clock = new t.Clock(); // A high-performance timer used to calculate the time between rendering frames in order to smooth animation
	projector = new t.Projector(); // A helper class for projecting 2D rays (on the screen) into 3D rays (in the virtual world)
	scene = new t.Scene(); // The "world" environment. Holds all other objects.
	scene.fog = new t.FogExp2(0xD6F1FF, 0.0005); // Add fog to the world. Helps with depth perception. Params are color (in hex) and density

	// Set up camera so we know from where to render the scene
	cam = new t.PerspectiveCamera(60, ASPECT, 1, 10000); // Field Of Viw, aspect ratio, near, far
	cam.position.y = UNITSIZE * .2; // Raise the camera off the ground
	scene.add(cam); // Add the camera to the scene

	// Camera moves with mouse, flies around with WASD/arrow keys
	controls = new t.FirstPersonControls(cam); // Handles camera control
	controls.movementSpeed = MOVESPEED; // How fast the player can walk around
	controls.lookSpeed = LOOKSPEED; // How fast the player can look around with the mouse
	controls.lookVertical = false; // Don't allow the player to look up or down. This is a temporary fix to keep people from flying
	controls.noFly = true; // Don't allow hitting R or F to go up or down

	// World objects
	setupScene(); // Adds physical objects to the world. Described later

	// Artificial Intelligence
	setupAI(); // Adds enemies to the world. Described later

	// Handle drawing as WebGL (faster than Canvas but less supported by browsers)
	renderer = new t.WebGLRenderer();
	renderer.setSize(WIDTH, HEIGHT); // Give the renderer the canvas size explicitly

	// Add the canvas to the document
	renderer.domElement.style.backgroundColor = '#D6F1FF'; // Make it easier to see that the canvas was added. Also this is the sky color
	document.body.appendChild(renderer.domElement); // Add the canvas to the document

	// Track mouse position (set mouse.x and mouse.y to pointer coordinates) so we know where to shoot
	document.addEventListener( 'mousemove', onDocumentMouseMove, false );

	// Shoot on click
	$(document).click(function(e) {
		e.preventDefault();
		if (e.which === 1) { // Left click only, courtesy of jQuery
			createBullet(); // Shoot a bullet. Described later
		}
	});

	// Display the HUD: radar, health, score, and credits/directions
	$('body').append('<canvas id="radar" width="200" height="200"></canvas>');
	$('body').append('<div id="hud"><p>Health: <span id="health">100</span><br />Score: <span id="score">0</span></p></div>');
	$('body').append('<div id="credits"><p>Created by <a href="http://www.isaacsukin.com/">Isaac Sukin</a> using <a href="http://mrdoob.github.com/three.js/">Three.js</a><br />WASD to move, mouse to look, click to shoot</p></div>');

	// Set up the brief red flash that shows when you get hurt
	$('body').append('<div id="hurt"></div>');
	$('#hurt').css({width: WIDTH, height: HEIGHT,});
}
Most of this is documented inline above. What's remarkable about it is that Three.js takes care of almost all the setup with just a few lines of code; the bulk of my job is now to write setupScene(), setupAI(), and createBullet() to add objects, enemies, and the ability to shoot, respectively. Note that THREE.FirstPersonControls is provided by Three.js but I actually overwrote it to make some changes required for walking (it was designed for flying); this is evident in that controls.lookVertical has a slightly different effect in the original version and controls.noFly originally did nothing at all.
The code that creates the map itself is in setupScene(), lines 278-323. It's called during init() when the entire game environment is initialized based on the initial setup code above.
// Set up the objects in the world
function setupScene() {
	var units = mapW;

	// Geometry: floor
	var floor = new t.Mesh(
			new t.CubeGeometry(units * UNITSIZE, 10, units * UNITSIZE),
			new t.MeshLambertMaterial({color: 0xEDCBA0})
	);
	scene.add(floor);

	// Geometry: walls
	var cube = new t.CubeGeometry(UNITSIZE, WALLHEIGHT, UNITSIZE);
	var materials = [
	                 new t.MeshLambertMaterial({map: t.ImageUtils.loadTexture('images/wall-1.jpg')}),
	                 new t.MeshLambertMaterial({map: t.ImageUtils.loadTexture('images/wall-2.jpg')}),
	                 ];
	for (var i = 0; i < mapW; i++) {
		for (var j = 0, m = map[i].length; j < m; j++) {
			if (map[i][j]) {
				var wall = new t.Mesh(cube, materials[map[i][j]-1]);
				wall.position.x = (i - units/2) * UNITSIZE;
				wall.position.y = WALLHEIGHT/2;
				wall.position.z = (j - units/2) * UNITSIZE;
				scene.add(wall);
			}
		}
	}

	// Health cube
	healthcube = new t.Mesh(
			new t.CubeGeometry(30, 30, 30),
			new t.MeshBasicMaterial({map: t.ImageUtils.loadTexture('images/health.png')})
	);
	healthcube.position.set(-UNITSIZE-15, 35, -UNITSIZE-15);
	scene.add(healthcube);

	// Lighting
	var directionalLight1 = new t.DirectionalLight( 0xF7EFBE, 0.7 );
	directionalLight1.position.set( 0.5, 1, 0.5 );
	scene.add( directionalLight1 );
	var directionalLight2 = new t.DirectionalLight( 0xF7EFBE, 0.5 );
	directionalLight2.position.set( -0.5, -1, -0.5 );
	scene.add( directionalLight2 );
}
There's a lot going on here, so let's break it down.
The first block of code creates the floor. Since the entire map is flat, we can just use one very wide cube for the floor for the entire map. Three.js represents objects in the world with "meshes" which have a "geometry" and a "material" representing their physical shape and color/texture, respectively. Each mesh must be explicitly added to the scene (a fact which is annoyingly easy to forget). In this case we use a cube shape for the geometry and a solid-colored Lambert material for the texture. Three.js has several kinds of materials, the most useful ones being Basic (unlit, meaning displays in full color regardless of lighting) and Lambert or Phong (affected by lights).
The next block of code loops over the map array (the 2D array of 0's/1's/2's above) and creates cubes representing the walls accordingly, moving them to the correct location and adding them to the scene. We're using images for the material textures here, which in the case of a cube stretches the image across each face of the cube.
The next block of code adds the health pickup in much the same way as the wall cubes. It is moved to a new location with a slightly different syntax -- each mesh has a "position" and "rotation" property containing the relevant metric on each axis along with some helper methods, so using position.set() is the same as setting each axis independently as I did with the walls. We'll use rotation to rotate the health cube and position to check collision and move the player, AI, and bullets.
Finally we add the lights, primarily used to light up the walls. There are a few kinds of lights that Three.js provides but Directional lights seem to affect everything in a scene equally so they are useful for global lighting. I set the two lights facing in opposite directions to simulate reflection (i.e. so walls facing away from the first light wouldn't be black) but used different intensities to help with depth perception.
There's a lot of math that Three.js lets you gloss over here. It's pretty awesome how easy it is to just stick primitive 3D shapes into a world.
The next step is animation, which begins with animate(), lines 116-122:
// Helper function for browser frames
function animate() {
	if (runAnim) {
		requestAnimationFrame(animate);
	}
	render();
}
requestAnimationFrame is a browser function (currently vendor-prefixed, but with a Three.js-provided polyfill) that asynchronously calls the function passed as its first parameter every time the browser is ready to paint a new frame (i.e. refresh what it's displaying to the user). So basically what we're doing here is running render() repeatedly as if animate() were recursive. render() is the main game loop where all the collision is calculated, movement/position is updated, and the canvas is recalculated and redrawn. render() is huge -- lines 124-276 -- so I'm not going to copy it all below, but let's look at interesting parts.
	var delta = clock.getDelta();
	controls.update(delta); // Move camera
The first thing we do is tell the FirstPersonControls to move the player's position and where the camera is looking based on mouse and keyboard input. I believe that delta here is the time since the last frame was painted, which is used to smooth animation.
	if (Date.now() > lastHealthPickup + 60000) {
		if (distance(cam.position.x, cam.position.z, healthcube.position.x, healthcube.position.z) < 15 && health != 100) {
			health = Math.min(health + 50, 100);
			$('#health').html(health);
			lastHealthPickup = Date.now();
		}
		healthcube.material.wireframe = false;
	}
	else {
		healthcube.material.wireframe = true;
	}
Here we check if the health pickup has been picked up in the last minute (60000 milliseconds). If it has, and if we're within 15 units of it, we "pick up" the health and set the health cube to display only the wireframe. This is an effective way to indicate that the health is "gone" for awhile. Note that the health cube is 30x30x30, so the "distance" method we're using to calculate collision is approximate; the main reason for this is that 3D collision is hard (i.e. detecting that a point is inside a 3D object requires math I didn't want to deal with) and as far as I can tell there is no support for that in Three.js so I took the easy route and just checked if the player was in a given radius in a 2D plane.
Also note that you can't accidentally pick up the health if you're already at full health -- it's the little things that count.
	for (var i = bullets.length-1; i >= 0; i--) {
		var b = bullets[i], p = b.position, d = b.ray.direction;
		if (checkWallCollision(p)) {
			bullets.splice(i, 1);
			scene.remove(b);
			continue;
		}
	...
This is where bullet collision starts. bullets is an array of the bullet objects in the map. Note that we're iterating over bullets backwards so that removing a bullet from the array will not cause problems iterating over the rest of the array. Also note that we have to explicitly remove the bullet from the scene in order to get it to disappear. checkWallCollision() does what it sounds like.
			if (p.x < c.x + x && p.x > c.x - x &&
					p.z < c.z + z && p.z > c.z - z &&
					b.owner != a) {
				bullets.splice(i, 1);
				scene.remove(b);
				a.health -= PROJECTILEDAMAGE;
				var color = a.material.color, percent = a.health / 100;
				a.material.color.setRGB(
						percent * color.r,
						percent * color.g,
						percent * color.b
				);
				hit = true;
				break;
			}
This code calculates collision between an enemy (a) and a bullet. For simplicity, I spawned the bullets at the shooter's location, so I had to check that the bullet was not created by the entity it's colliding with before applying damage. I'm also darkening the damaged AI's color by multiplying the RGB components by the AI's health as a percent. I was frankly surprised that this still worked when I started using images as textures instead of solid colors, but somehow it does. Three.js provides pretty robust methods for working with color and you can do some fun things with it.
		if (distance(p.x, p.z, cam.position.x, cam.position.z) < 25 && b.owner != cam) {
			$('#hurt').fadeIn(75);
			// ... hurt the player ...
			$('#hurt').fadeOut(350);
		}
When the player gets hit by a bullet, we flash a red <div> in front of the canvas with the pointer-events: none; CSS rule applied so clicks still go straight through to the canvas instead of to the div. I love this effect -- it became pretty clear it was necessary when I started getting shot from behind and not noticing my health go down. :-) This is a nice easy way to provide one of those crucial little things that count. jQuery's fadeIn() and fadeOut() are great here.
			b.translateX(speed * d.x);
			b.translateZ(speed * d.z);
When you move an object you can either set its position directly or shift it along various axes. Translating does some extra processing -- I haven't taken the time to read through what it does but I assume some flags are set to recalculate lighting etc.
		// Move AI
		var r = Math.random();
		if (r > 0.995) {
			a.lastRandomX = Math.random() * 2 - 1;
			a.lastRandomZ = Math.random() * 2 - 1;
		}
		a.translateX(aispeed * a.lastRandomX);
		a.translateZ(aispeed * a.lastRandomZ);
		var c = getMapSector(a.position);
		if (c.x < 0 || c.x >= mapW || c.y < 0 || c.y >= mapH || checkWallCollision(a.position)) {
			a.translateX(-2 * aispeed * a.lastRandomX);
			a.translateZ(-2 * aispeed * a.lastRandomZ);
			a.lastRandomX = Math.random() * 2 - 1;
			a.lastRandomZ = Math.random() * 2 - 1;
		}
		if (c.x < -1 || c.x > mapW || c.z < -1 || c.z > mapH) {
			ai.splice(i, 1);
			scene.remove(a);
			addAI();
		}
This code governs AI movement. 99.5% of the time the enemies keep going in the same direction they were previously going; they choose a new direction the rest of the time or when they hit a wall. Somehow this worked out pretty well and the enemies seem to do a pretty good job of getting around the map and dodging bullets. I really wanted to use qiao's PathFinding.js library but I couldn't figure out why it kept returning an empty path unpredictably when there was clearly a path between two points.
renderer.render(scene, cam); // Repaint
Recalculate and redraw the scene.
We're almost done! We just have to add the AI, lines 333-352:
function addAI() {
	var c = getMapSector(cam.position);
	var aiMaterial = new t.MeshBasicMaterial({map: t.ImageUtils.loadTexture('images/face.png')});
	var o = new t.Mesh(aiGeo, aiMaterial);
	do {
		var x = getRandBetween(0, mapW-1);
		var z = getRandBetween(0, mapH-1);
	} while (map[x][z] > 0 || (x == c.x && z == c.z));
	x = Math.floor(x - mapW/2) * UNITSIZE;
	z = Math.floor(z - mapW/2) * UNITSIZE;
	o.position.set(x, UNITSIZE * 0.15, z);
	o.health = 100;
	o.pathPos = 1;
	o.lastRandomX = Math.random();
	o.lastRandomZ = Math.random();
	o.lastShot = Date.now(); // Higher-fidelity timers aren't a big deal here.
	ai.push(o);
	scene.add(o);
}
There's nothing new here -- we're picking a random spawning point for each enemy that is inside the map and not in the same "map sector" as the player (each "map sector" being one value in the 2D map array). Then we set a bunch of parameters (other than position, all my own) and add our AI to the list of enemies (ai) and to the scene.
Fast-forward through some helper functions and we get to drawRadar(), lines 412-451:
// Radar
function drawRadar() {
	var c = getMapSector(cam.position), context = document.getElementById('radar').getContext('2d');
	context.font = '10px Helvetica';
	for (var i = 0; i < mapW; i++) {
		for (var j = 0, m = map[i].length; j < m; j++) {
			var d = 0;
			for (var k = 0, n = ai.length; k < n; k++) {
				var e = getMapSector(ai[k].position);
				if (i == e.x && j == e.z) {
					d++;
				}
			}
			if (i == c.x && j == c.z && d == 0) {
				context.fillStyle = '#0000FF';
				context.fillRect(i * 20, j * 20, (i+1)*20, (j+1)*20);
			}
			else if (i == c.x && j == c.z) {
				context.fillStyle = '#AA33FF';
				context.fillRect(i * 20, j * 20, (i+1)*20, (j+1)*20);
				context.fillStyle = '#000000';
				context.fillText(''+d, i*20+8, j*20+12);
			}
			else if (d > 0 && d < 10) {
				context.fillStyle = '#FF0000';
				context.fillRect(i * 20, j * 20, (i+1)*20, (j+1)*20);
				context.fillStyle = '#000000';
				context.fillText(''+d, i*20+8, j*20+12);
			}
			else if (map[i][j] > 0) {
				context.fillStyle = '#666666';
				context.fillRect(i * 20, j * 20, (i+1)*20, (j+1)*20);
			}
			else {
				context.fillStyle = '#CCCCCC';
				context.fillRect(i * 20, j * 20, (i+1)*20, (j+1)*20);
			}
		}
	}
}
The radar is actually another canvas that we're drawing on in 2D this time instead of with WebGL. We look at each sector of the map (from the 2D map array), figure out what's there (a wall, the player, enemies, or both the player and enemies) and draw a colored square accordingly. The drawing uses the low-level HTML5 Canvas API to make changes to the 2D graphics context object.
On lines 453-484, we create some bullets:
var bullets = [];
var sphereMaterial = new t.MeshBasicMaterial({color: 0x333333});
var sphereGeo = new t.SphereGeometry(2, 6, 6);
function createBullet(obj) {
	if (obj === undefined) {
		obj = cam;
	}
	var sphere = new t.Mesh(sphereGeo, sphereMaterial);
	sphere.position.set(obj.position.x, obj.position.y * 0.8, obj.position.z);

	if (obj instanceof t.Camera) {
		var vector = new t.Vector3(mouse.x, mouse.y, 1);
		projector.unprojectVector(vector, obj);
		sphere.ray = new t.Ray(
				obj.position,
				vector.subSelf(obj.position).normalize()
		);
	}
	else {
		var vector = cam.position.clone();
		sphere.ray = new t.Ray(
				obj.position,
				vector.subSelf(obj.position).normalize()
		);
	}
	sphere.owner = obj;

	bullets.push(sphere);
	scene.add(sphere);

	return sphere;
}
This is a little bit tricky. Basically obj is the entity shooting the bullet (assumed to be cam, i.e. the player, if not passed). Each bullet is a sphere created at the shooter's location. In order to figure out where the bullet should go, we calculate a ray from the starting point (the shooter) to the ending point (either the place the player last clicked on the screen or the player's location, depending on who's doing the shooting). We later use the ray's direction property to calculate the bullet's movement. When the player is shooting, we have to use projector.unprojectVector() to translate clicking on the 2D screen to shooting in the 3D world. The translation is not perfect because technically the bullet can only move horizontally, but it's Good Enough.
Most of what you'll see on the internet about collision with Three.js recommends using rays because they have methods to determine whether objects intersect with them. Unfortunately this doesn't help to tell you whether the originating object overlaps, just whether it would overlap if it kept going, so that's only really useful for knowing what you clicked on.
Lastly, we resize everything when the window size changes, and stop the player from spinning in a circle when the tab goes out of focus (lines 502-523):
// Handle window resizing
$(window).resize(function() {
	WIDTH = window.innerWidth;
	HEIGHT = window.innerHeight;
	ASPECT = WIDTH / HEIGHT;
	if (cam) {
		cam.aspect = ASPECT;
		cam.updateProjectionMatrix();
	}
	if (renderer) {
		renderer.setSize(WIDTH, HEIGHT);
	}
	$('#intro, #hurt').css({width: WIDTH, height: HEIGHT,});
});

// Stop moving around when the window is unfocused (keeps my sanity!)
$(window).focus(function() {
	if (controls) controls.freeze = false;
});
$(window).blur(function() {
	if (controls) controls.freeze = true;
});
And that's the gist. Three.js abstracts away most of the math, so we get to focus mostly on the game world and its mechanics. Be sure to try out the game or fork the source!
Update, October 2013: I wrote a book, Game Development with Three.js, that goes into much more detail on the concepts discussed in this article and much more about how to build a fuller in-browser game. Check it out if you'd like to learn more!